Image Processing Techniques Overview
Image processing techniques I organized while working on real projects
TL;DR Image processing is a technology that makes photos and videos "look better" and "extracts meaning" from them. This article explains the core concepts in simple terms and includes practical tips.
First, Let's Simplify the Terms
- Image Processing: The entire process of "editing and analyzing" photos.
- Computer Vision: Technology that helps computers understand what is in an image, like humans do.
- Pixel: The smallest dot that makes up a photo. It contains color and brightness values.
- Filter/Kernel: A small calculation frame that passes over the photo to sharpen or blur it.
- Histogram: A graph showing the brightness distribution in a photo. The compass for brightness/contrast adjustment.
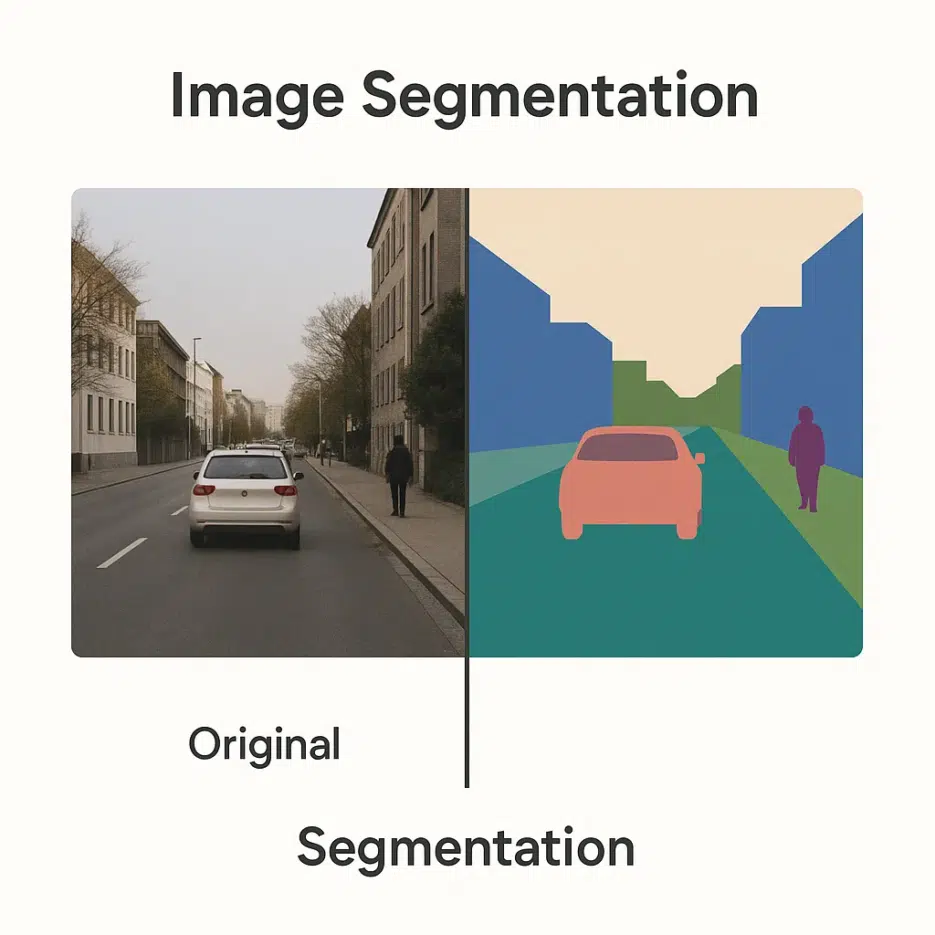
- Segmentation: The process of dividing a photo into regions like sky/person/road.
- Feature: Hints that computers use for distinction, like edges, textures, and color patterns.
- CNN: A deep learning model family that handles images well. It automatically learns features.
- GAN: A model pair where "generator vs discriminator" compete to create realistic-looking images.
- Noise: Interference mixed into the original information. Like the tiny specks in dark photos.
Why Image Processing, Now?
From medical (CT/MRI), security (facial recognition), satellite/drone (remote sensing), autonomous driving (lane/pedestrian detection), to entertainment (VFX/photo editing) — image processing is the foundation of all visual experiences. It's also essential for making AI-generated image results sharper and more convincing.

The Big Map of Image Processing
Image processing is typically organized into these 5 flows.
1) Image Enhancement
Goal: Make it look better. The "washing up" stage before analysis.
- Contrast/Brightness Adjustment: Make blurry photos clearer.
- Histogram Equalization: Bring out hidden details in dark photos.
- Noise Removal (Gaussian, etc.): Reduce tiny specks and rough grain.
💡 Quick Tip: If your selfie looks flat, slightly increase local contrast (clarity), and process noise at low intensity first.
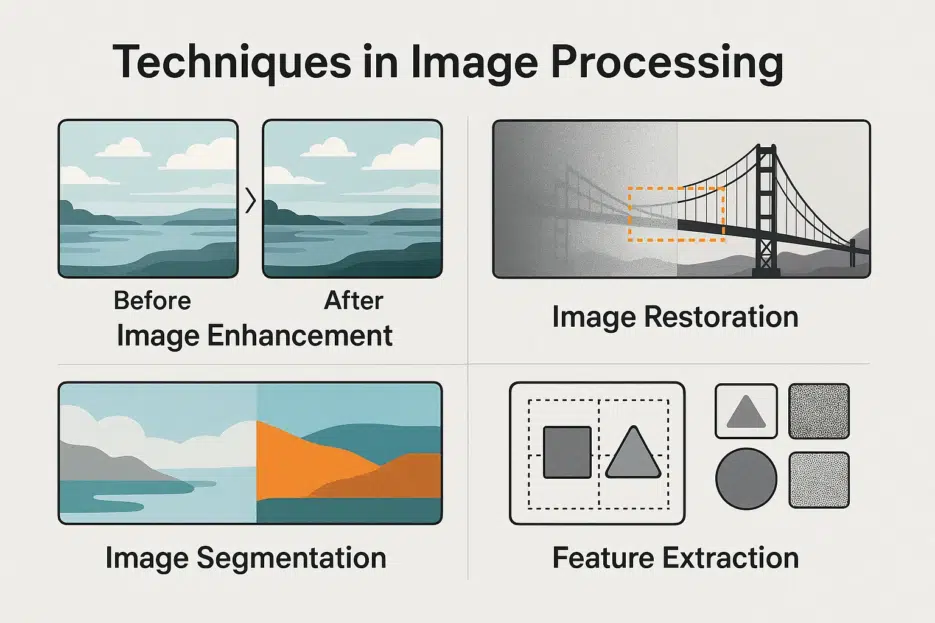
2) Image Restoration
Goal: Reverse blur and damage.
- De-blur: Restore sharpness in shaky photos.
- Inpainting: Remove distractions like utility poles/power lines and fill in naturally.
🎯 Point: Overdoing de-blur shows ringing/distortion. Always go small → large.

3) Segmentation
Goal: Divide the photo into regions for easier understanding.
- Thresholding: Separate into black/white based on brightness.
- Edge Detection (Canny/Sobel): Extract only the boundaries to understand structure.
- Clustering (K-means): Group similar colors/brightness together.
🧩 Where is it used? Essential for lane/pedestrian separation in autonomous driving, organ region segmentation in medical imaging, etc.
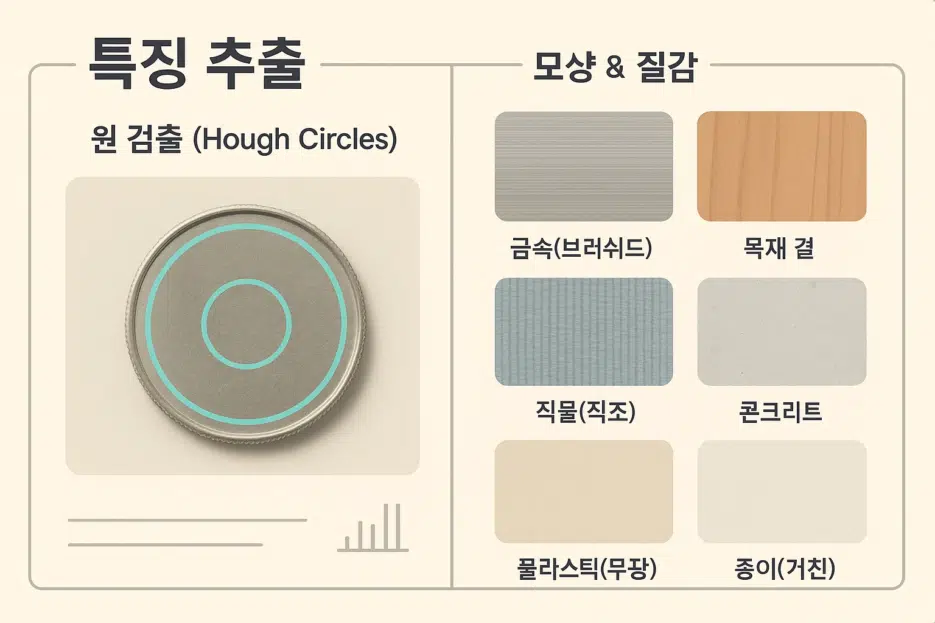
4) Feature Extraction
Goal: Extract hints that help with distinction.
- Shape Detection (e.g., circles/lines): e.g., Finding the circular edge of a coin.
- Texture Analysis: Distinguish materials/patterns by surface patterns.
🔎 Tip: You'd be surprised how well simple rule-based features work for some problems (especially industrial inspection).
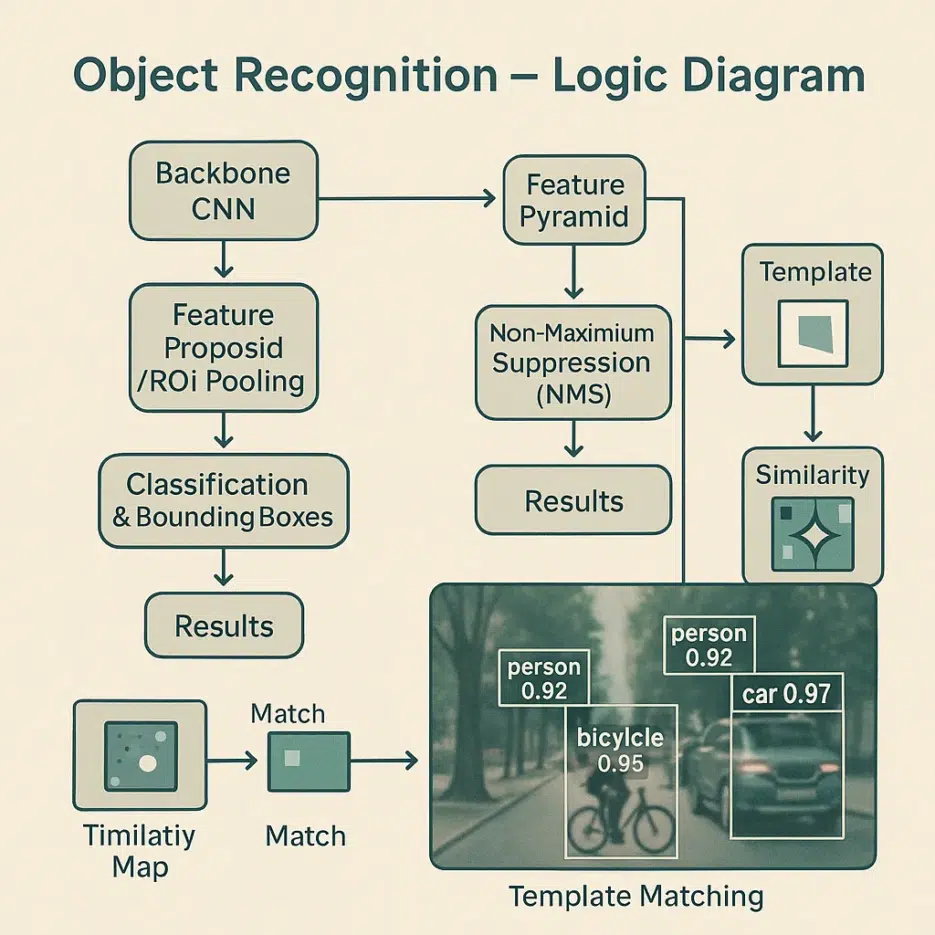
5) Object Recognition
Goal: Name what is in the photo.
- Machine Learning (especially CNN): Learn objects from large-scale data.
- Template Matching: Find parts similar to a reference pattern.
🧠 Check: If data is biased, results will be biased too. Collect data from various angles/lighting/backgrounds.
Where Is It Used? Industry Snapshots
- Medical: Emphasize micro lesions through CT/MRI post-processing, assist X-ray anomaly detection.
- Security: Real-time monitoring through facial recognition and abnormal behavior detection.
- Remote Sensing: Assess wildfire/flood damage extent with satellite photos, track urban changes.
- Automotive: Support ADAS/autonomous driving with lane/pedestrian/traffic light recognition.
- Entertainment: Movie VFX, auto-correction in photo/video apps.
How Deep Learning Changed the Game
- CNN: Learns features on its own instead of human input, excels at classification and detection.
- GAN: Upscales low-resolution images to high-resolution (super-resolution) and generates realistic-looking new images.
- Transfer Learning: Take pre-trained models like ResNet, ViT and quickly customize with less data.
🚀 Starting Tip: For small datasets, transfer learning + fine-tuning is the most cost-effective.
Practical Concerns
- Data Quality: Label errors and bias will ruin results → Multiple reviews and sample balance are key.
- Computational Cost: High resolution and large volumes depend on GPU/memory → Utilize tiling, 16-bit, lightweight models.
- Privacy: Reduce risks with de-identification and on-device processing for faces and sensitive information.
Future Trends at a Glance
- Integration with AR/VR: Recognize real objects in real-time and naturally overlay them.
- Edge Computing: Process immediately near the camera → Lower latency and cost.
- Privacy-Preserving Learning: Balance data protection and performance with federated/differential privacy.


