You know that feeling when you're writing a prompt and thinking "I want it to look like it's shot from this angle..." but can't find the words to explain it? That frustration when you can picture it in your head but can't think of the English term.
When I first started, I didn't know how to describe "a shot looking down from above," so I just wrote something like "looking down from above" and got weird results. Turns out if you write "high angle" or "bird's eye view," the AI understands much better.
I came across this terminology guide compiled by Sinaida Cooper and thought "oh, so these are the words I needed!" so I translated it. Since these are based on cinematography terms, tools like Midjourney, Flux, and DALL-E recognize them well.
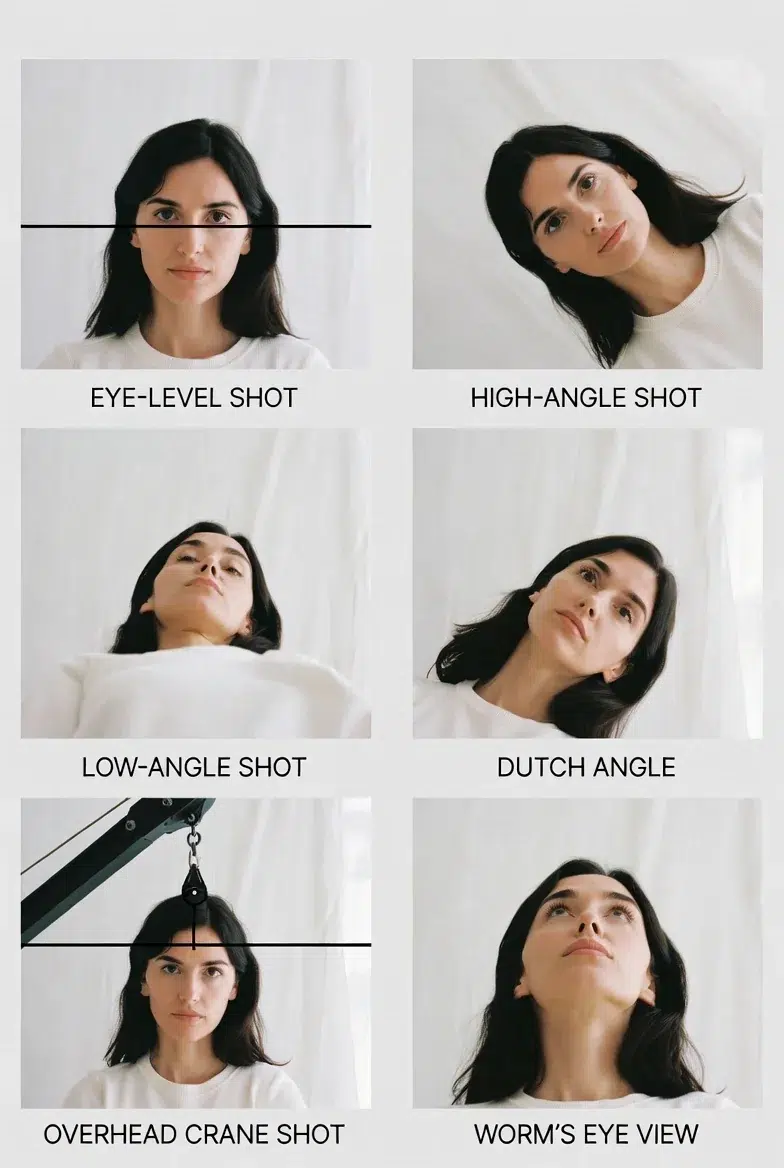
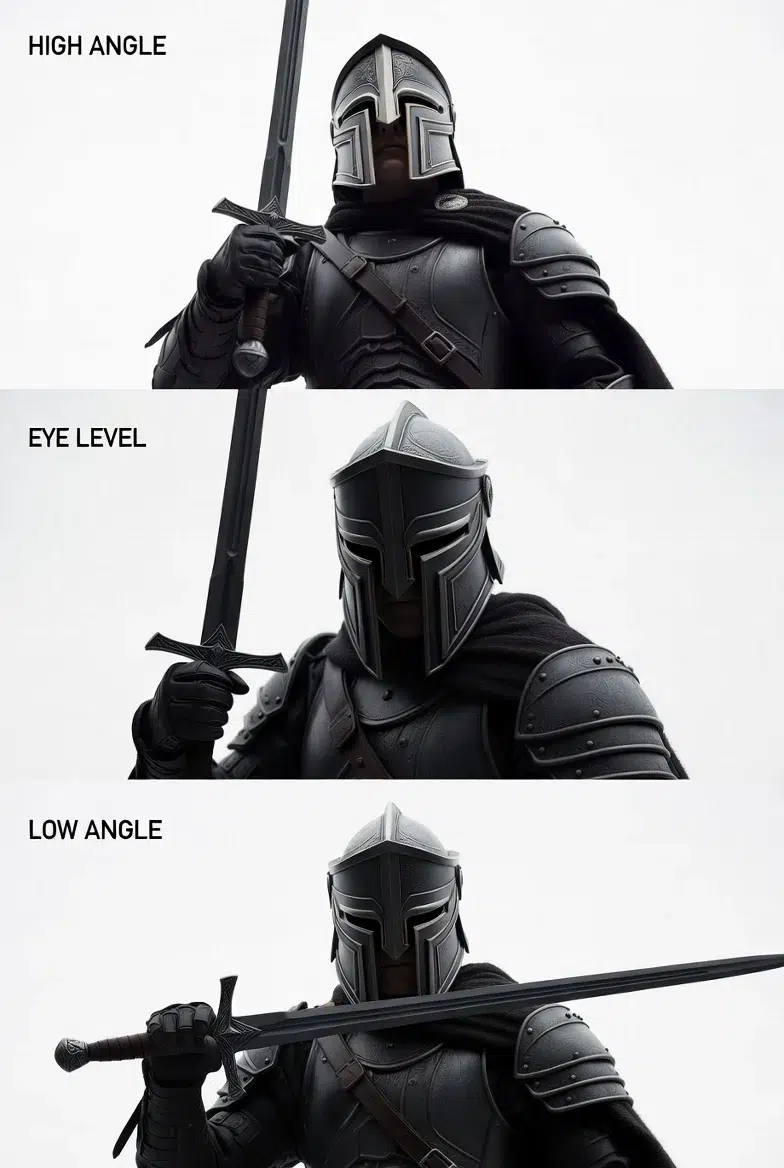
1. Camera Height (Vertical Position)
These terms determine where the camera sits on the Y-axis.
| English | Korean | Description |
|---|---|---|
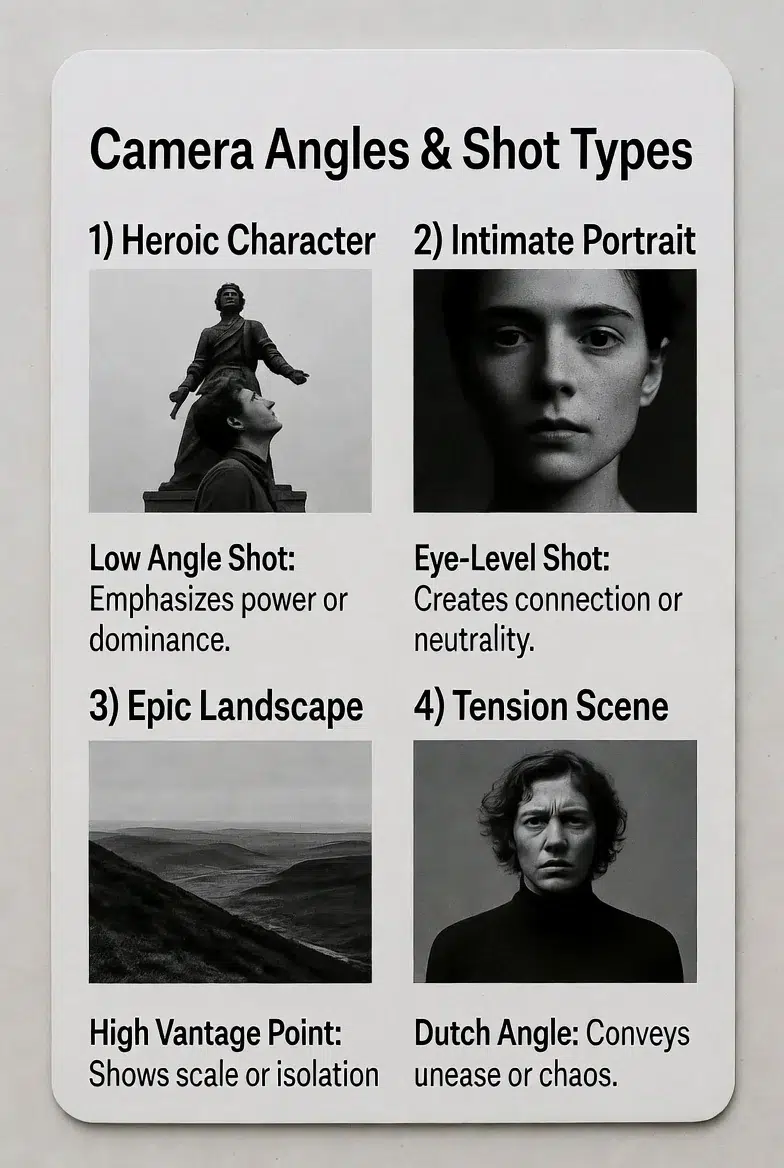
| high angle | 하이 앵글 | Looking down from above. Makes the subject appear smaller or weaker |
| low angle | 로우 앵글 | Looking up from below. Makes the subject appear grand and dominant |
| eye level | 아이 레벨 | At eye height. The most natural and neutral perspective |
| chest level | 체스트 레벨 | At chest height. Slightly lower than eye level. Creates an intimate feel |
| ground level | 그라운드 레벨 | Almost touching the ground |
| worm's eye view | 웜즈 아이 뷰 | Extremely low perspective. Exaggerated sense of scale |
| overhead / top-down | 오버헤드 / 탑다운 | Looking down from directly above the subject at 90 degrees |
From my experience, low angle works best. When you want to make a character look cool, adding this makes a real difference. Conversely, high angle is great for creating a cute or vulnerable feeling.
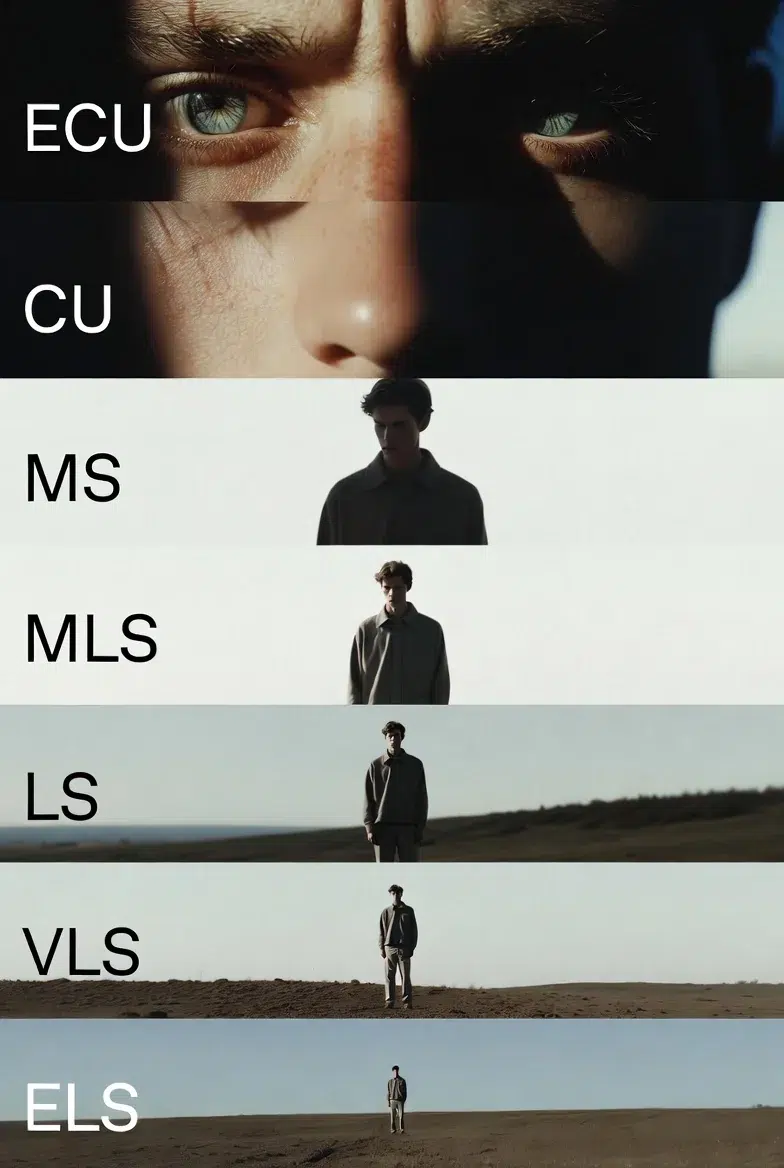
2. Camera Distance / Framing
This determines how much of the subject fits in the frame. Without knowing these, it's hard to get the composition you want.
| English | Korean | Description |
|---|---|---|
| extreme close-up (ECU) | 익스트림 클로즈업 | Only eyes, lips, or texture details visible |
| close-up (CU) | 클로즈업 | Head and neck |
| medium close-up (MCU) | 미디엄 클로즈업 | Shoulders to head |
| medium shot (MS) | 미디엄 샷 | Above the waist |
| medium wide shot (MWS) | 미디엄 와이드 샷 | Above the knees |
| wide shot (WS) | 와이드 샷 | Full body |
| long shot | 롱 샷 | Subject appears small in frame |
| extreme long shot (ELS) | 익스트림 롱 샷 | Environment-focused, subject very small |
| establishing shot | 이스타블리싱 샷 | For setting space and context. Buildings, cityscapes, etc. |
For character illustrations, I use medium shot or medium close-up the most. You can see the expression and the outfit to some extent, so it's good value. If you want to show the full body, you need to use wide shot, but then you lose some facial detail.
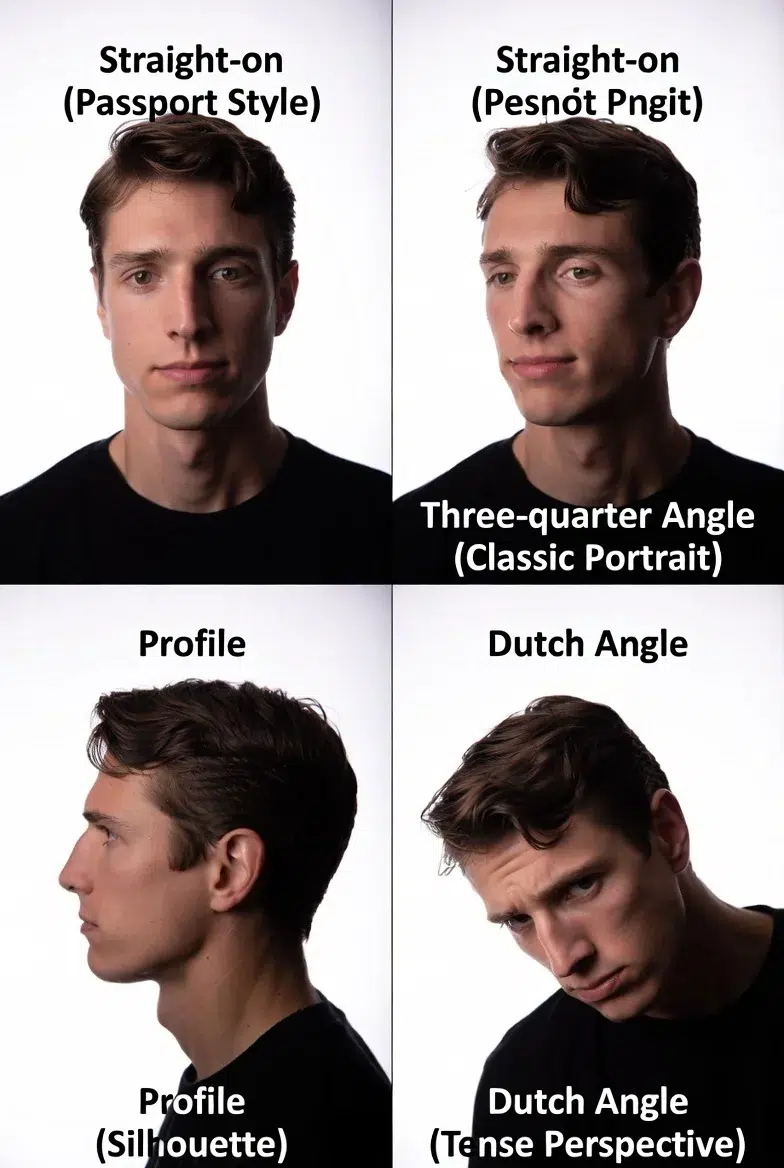
3. Camera Direction / Angle
This indicates how the lens rotates or aims.
| English | Korean | Description |
|---|---|---|
| straight-on | 정면 | Neutral front view |
| three-quarter angle | 쓰리쿼터 앵글 | 45 degrees from front. Most commonly used angle for portraits |
| profile / side-view | 프로필 / 사이드뷰 | 90-degree side view |
| back-view / rear angle | 백뷰 | Shot from behind |
| dutch angle / tilt | 더치 앵글 | Tilted horizon line. Expresses tension or unease |
Three-quarter angle is truly versatile. It looks the most natural and three-dimensional for portraits and character illustrations. Straight-on gives an ID photo feel, and profile creates a silhouette effect, so use them according to the situation.
Dutch angle is great for horror or thriller vibes, but overusing it makes things look dizzy, so use it in moderation.
4. Camera Position Relative to Subject
This represents the spatial relationship between camera and subject.
| English | Korean | Description |
|---|---|---|
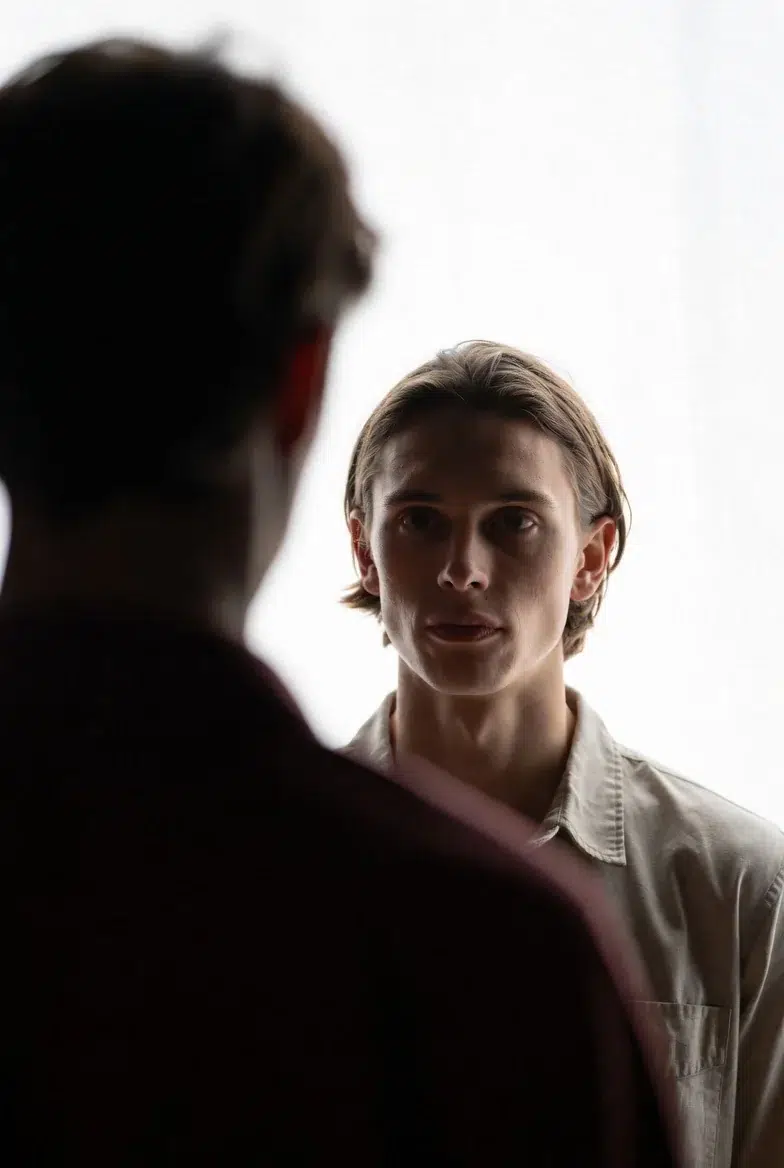
| over-the-shoulder (OTS) | 오버더숄더 | Looking at one character over another's shoulder |
| point-of-view (POV) | 1인칭 시점 | As if seeing through the character's eyes |
| reverse angle | 리버스 앵글 | Opposite side of OTS |
| back-to-camera | 백투카메라 | Character has their back to the camera |
| frontal symmetrical shot | 정면 대칭 샷 | Center-aligned, Kubrick-style |
POV is great for game art or creating immersive scenes. Writing something like "POV, reaching out hand toward viewer" really gives that first-person feel.
These terms tell the model where the camera is positioned in the scene.
| English | Korean | Description |
|---|---|---|
| front-facing | 정면 | Centered in front of the subject |
| off-axis left/right | 오프 액시스 | Slightly left/right of the subject |
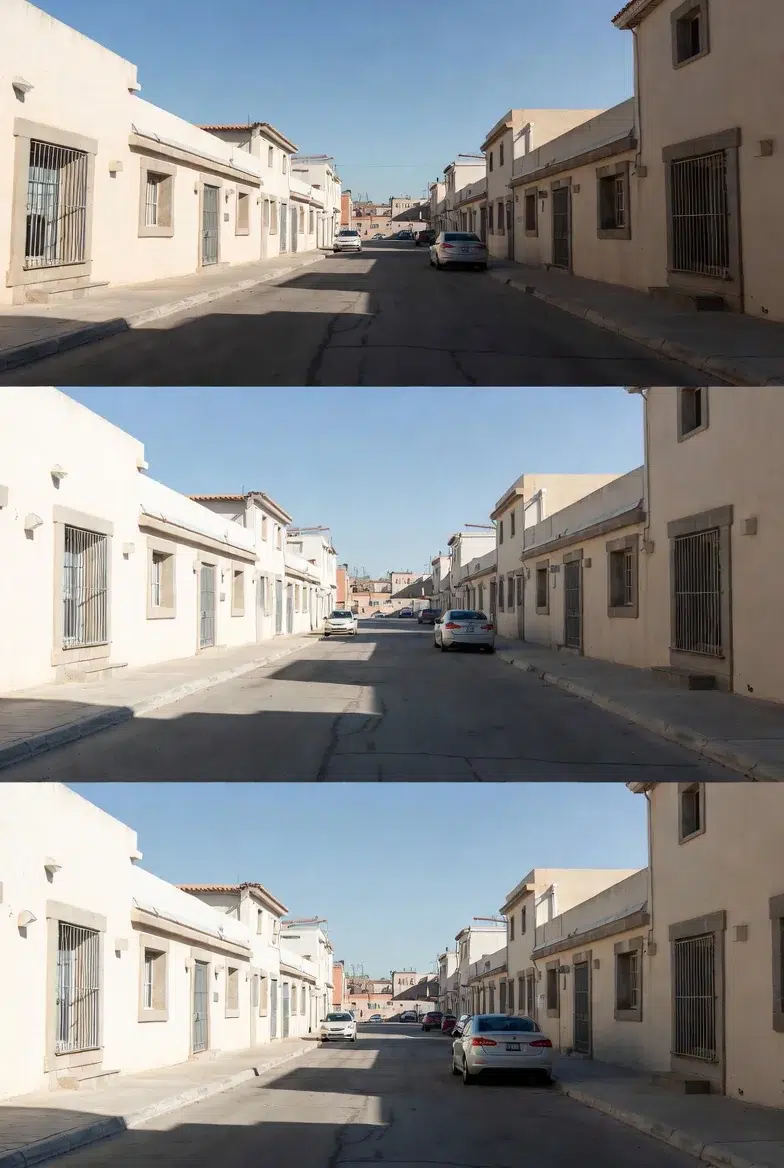
| high vantage point | 하이 밴티지 포인트 | Camera elevated, looking down |
| balcony-level viewpoint | 발코니 레벨 | Looking down from mid-height |
| rooftop vantage | 루프탑 밴티지 | Very high but not top-down |
| close foreground placement | 클로즈 포그라운드 | Foreground object right in front of camera |
| distant observation point | 디스턴트 옵저베이션 | Perspective of observing from far away |
Close foreground placement is effective for creating depth. Placing something blurry in the foreground with the main subject behind really brings out the three-dimensionality.
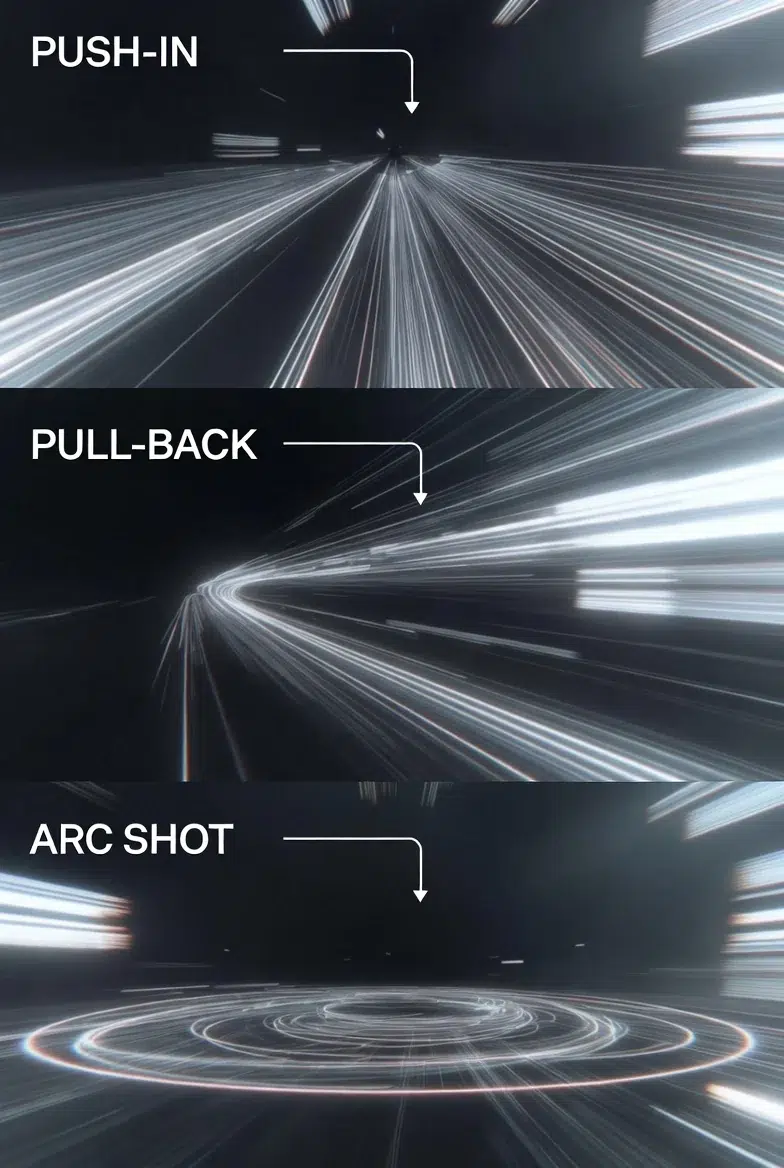
7. Camera Movement (For Still Images)
Even in still images, the direction of movement affects perspective. Useful for creating dynamic effects.
| English | Korean | Description |
|---|---|---|
| push-in | 푸쉬인 | Feeling of camera advancing forward |
| pull-back | 풀백 | Feeling of camera retreating |
| lateral tracking | 래터럴 트래킹 | Horizontal movement |
| arc shot | 아크 샷 | Feeling of circling around the subject |
| tilt-up / tilt-down | 틸트업 / 틸트다운 | Lens rotating up/down |
| handheld wobble | 핸드헬드 워블 | Subtle shake, documentary feel |
I sometimes use handheld wobble for a realistic photo feel. A slight shake can actually look more real than something perfectly stable.