If you've run an online store before, you probably know this. Product photo quality directly impacts sales.
According to statistics, over 75% of consumers make purchase decisions based on product photos. But what's the reality? Poor lighting, messy backgrounds, low resolution photos... Especially for small sellers who can't afford professional studio shoots.
I remember struggling with photos when selling second-hand items. Even if the product was in great condition, poor photos meant fewer responses.
After reading Sajid Khan's article, I thought "Oh, AI can do this too?" so I translated it. These are practical methods for improving product images with Stable Diffusion.

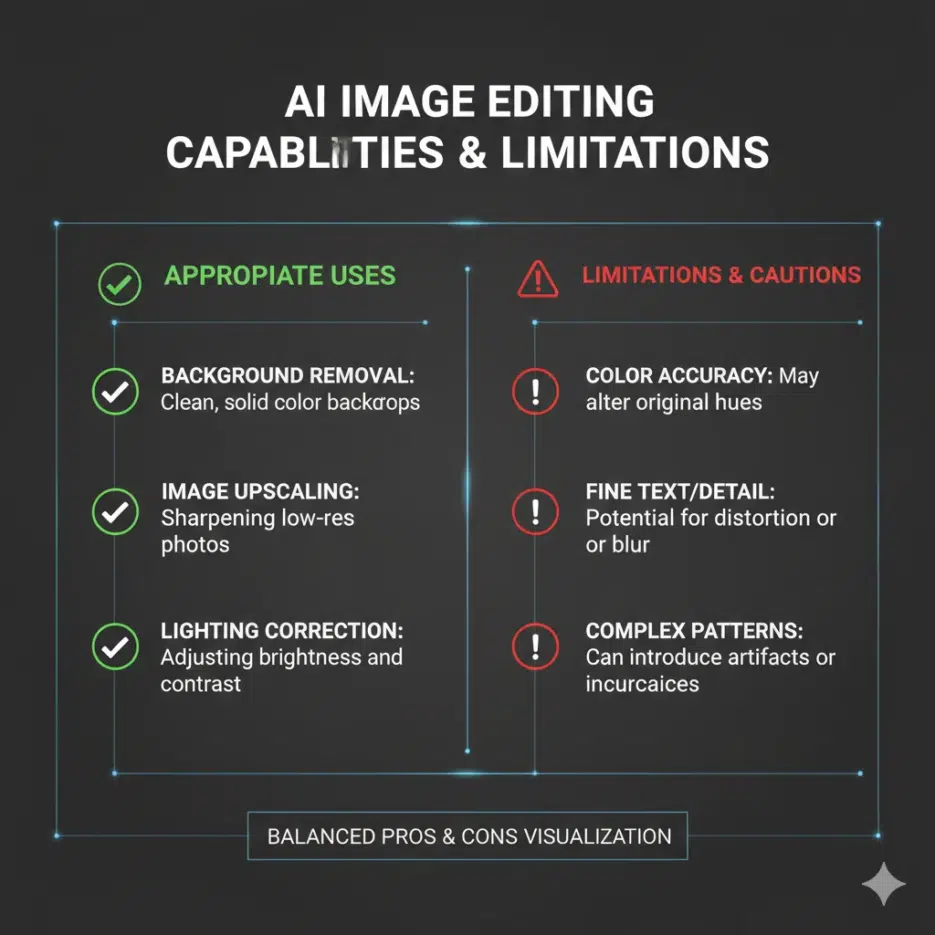
What You Can Do with Stable Diffusion
Here are the areas where SD can help with product images.
| Feature | Description |
|---|---|
| Image Upscaling | Low resolution photos to high resolution |
| Background Removal/Replacement | Messy background → Clean white background |
| Lifestyle Mockups | Place products in real-world usage environments |
| Inpainting | Restore damaged or missing parts |
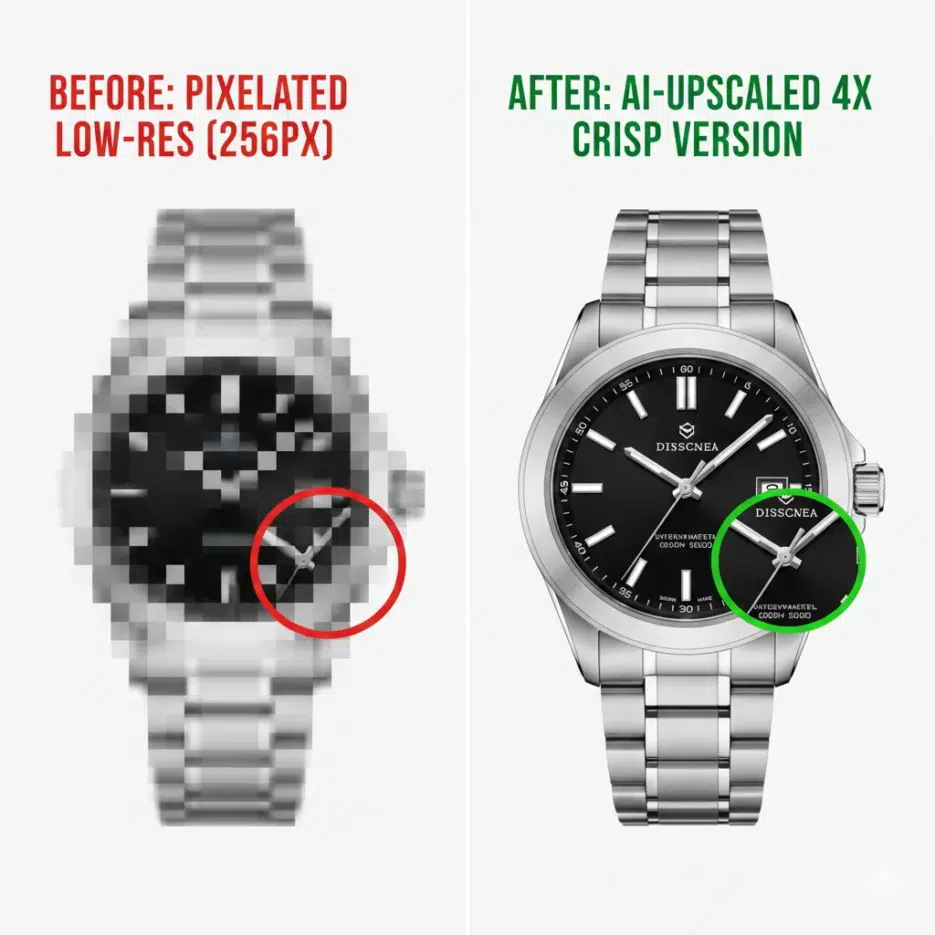
1. Image Upscaling (Increasing Resolution)
This converts low-resolution product photos to high resolution. It's not just stretching the image - AI generates new details.
When is this useful?
- Old low-quality product photos
- Casually taken phone photos
- Images where only thumbnails remain
Python Code Example
from diffusers import StableDiffusionUpscalePipeline
from PIL import Image

# Load upscaling model
upscale_pipe = StableDiffusionUpscalePipeline.from_pretrained(
    "stabilityai/stable-diffusion-x4-upscaler"
).to("cuda")

# Load low resolution image
low_res_img = Image.open("low_res_product.jpg").convert("RGB")

# Execute upscale
upscaled_img = upscale_pipe(
    prompt="A sharp, detailed product photo of a laptop",
    image=low_res_img
).images[0]

upscaled_img.save("upscaled_product.jpg")
Tip: Adding product type and desired feel to the prompt gives better results. Keywords like "sharp", "detailed", "professional" are effective.
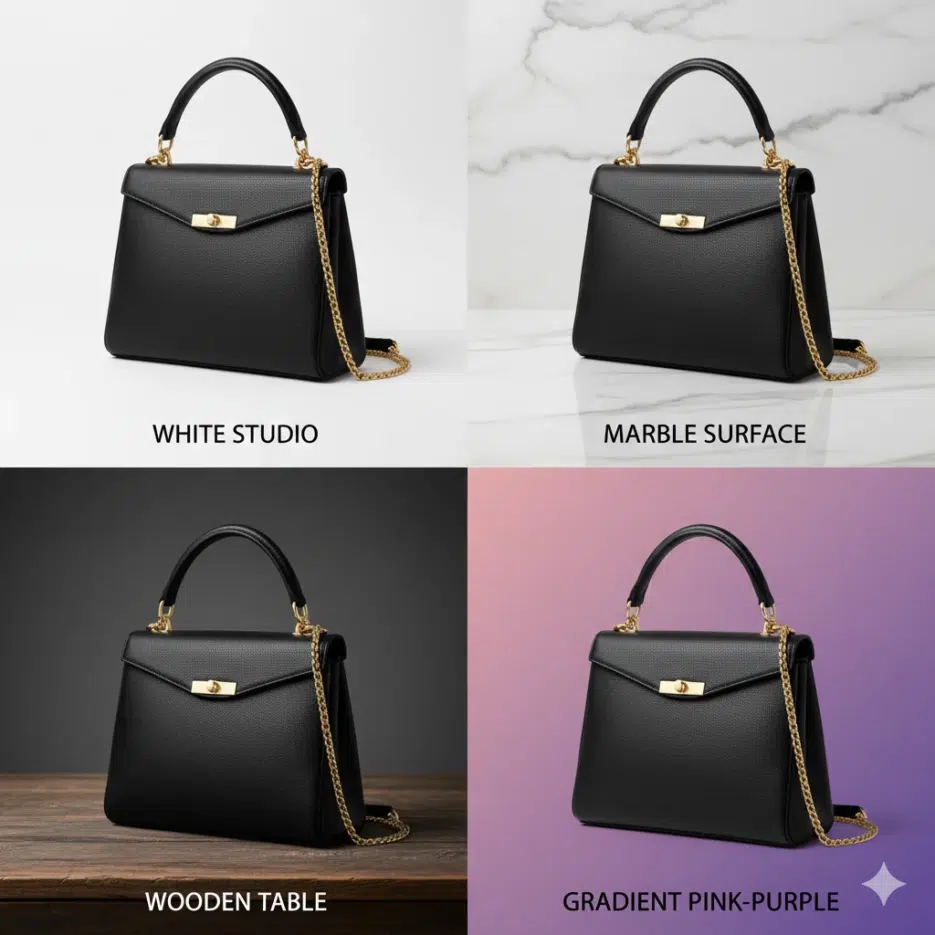
2. Background Removal and Replacement
Platforms like Amazon, Coupang, and Smart Store recommend or require white background product images. SD's inpainting feature can automatically replace backgrounds.
How It Works
- Mask the product image (mark the background area in white)
- SD inpainting generates new content for the masked area
- Replace with desired background
Python Code Example
from diffusers import StableDiffusionInpaintPipeline
from PIL import Image
Load inpainting model
inpaint_pipe = StableDiffusionInpaintPipeline.from_pretrained( "runwayml/stable-diffusion-inpainting" ).to("cuda")
Load product image and mask
product_img = Image.open("product_with_background.jpg") mask = Image.open("background_mask.jpg") # White = area to replace
Replace with clean background
clean_img = inpaint_pipe( prompt="A professional white background", image=product_img, mask_image=mask ).images[0]
clean_img.save("clean_product.jpg")
### Various Background Options
Just changing the prompt lets you create different backgrounds.
| Purpose | Prompt Example |
|---------|----------------|
| Basic (Marketplace) | "A professional white background" |
| Luxury feel | "A product on marble surface with soft shadows" |
| Natural feel | "A product on wooden table with soft natural lighting" |
| Trendy feel | "A product floating with gradient background, pink to purple" |
---
---
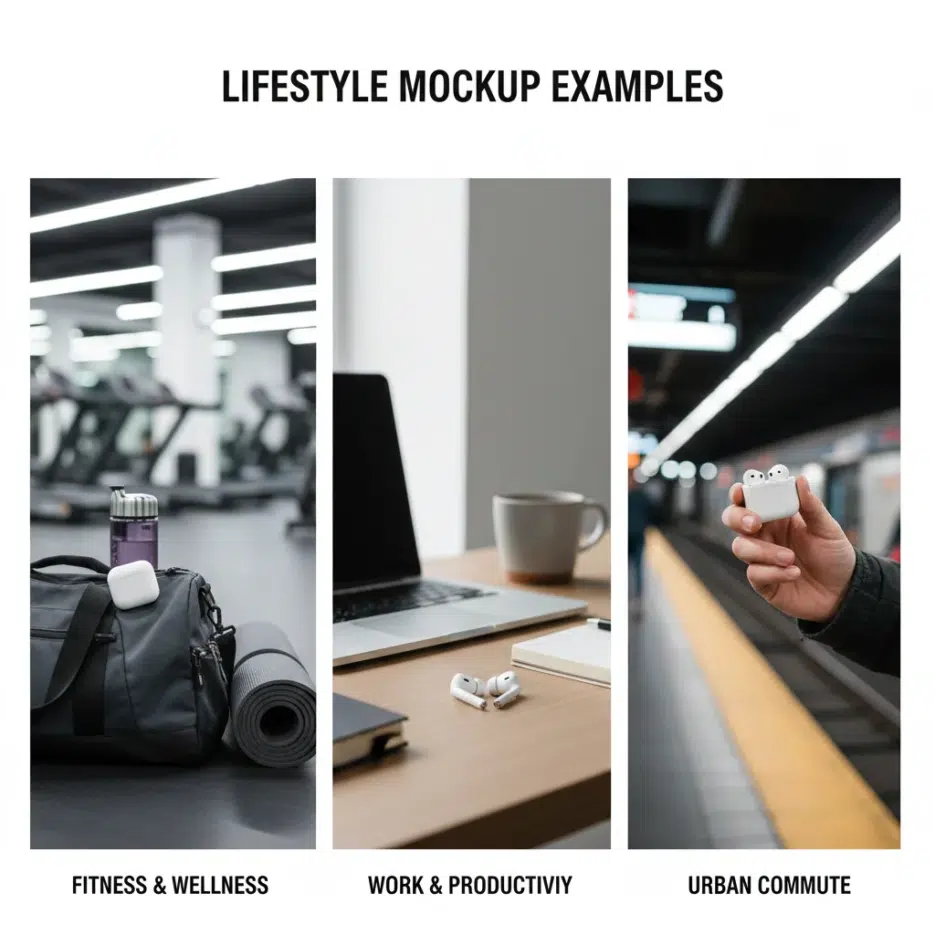
## 3. Lifestyle Mockup Generation
These are images showing products in actual usage environments. For example, a smartwatch on a wrist, furniture placed in a living room, etc.
Originally you'd need to hire models, rent locations, and shoot, but **AI can generate this**.
### Python Code Example
```python
from diffusers import StableDiffusionPipeline
pipe = StableDiffusionPipeline.from_pretrained(
"runwayml/stable-diffusion-v1-5"
).to("cuda")
# Generate lifestyle mockup
mockup = pipe(
prompt="A smartwatch worn by a stylish young man in a modern office, natural lighting, professional photo",
guidance_scale=7.5
).images[0]
mockup.save("lifestyle_smartwatch.jpg")
Category-Specific Examples
| Category | Prompt Example |
|---|---|
| Fashion | "A woman wearing [product] in urban street, fashion photography" |
| Furniture | "[product] in modern minimalist living room, interior design photo" |
| Electronics | "[product] on clean desk in home office, lifestyle photography" |
| Food | "[product] arranged on breakfast table, food photography, natural light" |
Note: Rather than generating from scratch, it's more accurate to keep the actual product photo and only change the background. You can use the Image-to-Image feature for this.
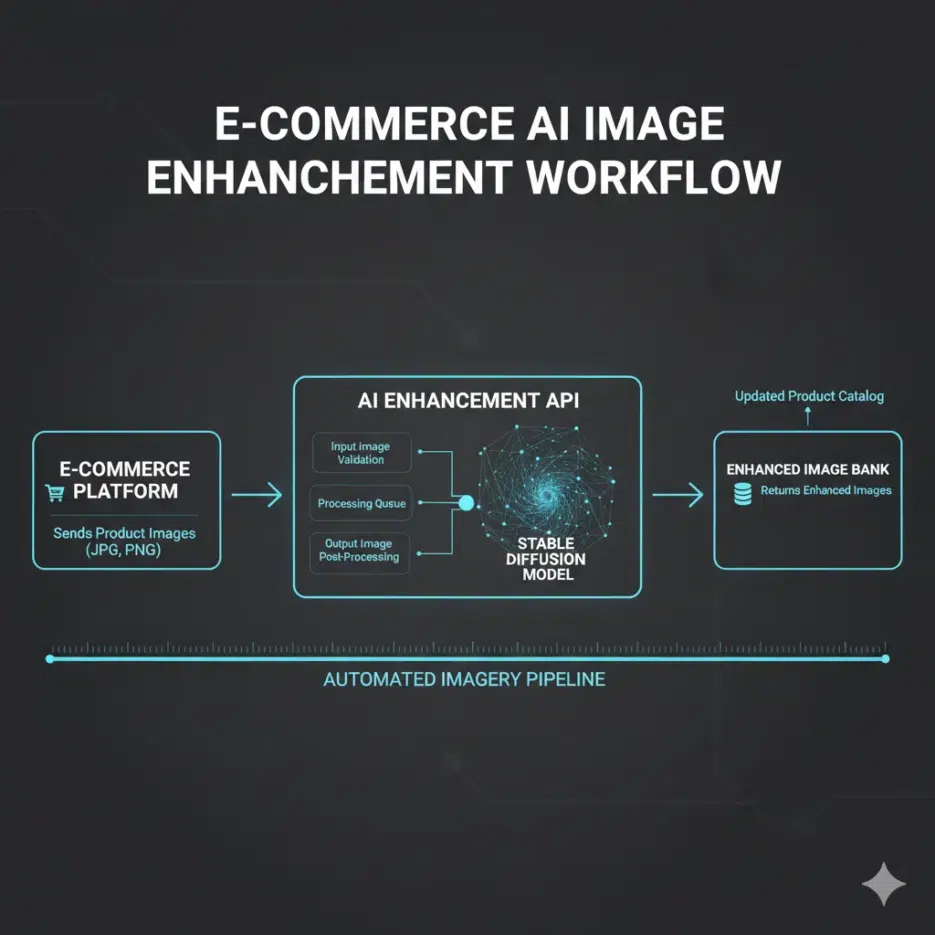
Deploying as an API Service (For Developers)
If you need to process large volumes of product images, deploying as an API is efficient. Here's an example using FastAPI.
from fastapi import FastAPI, File, UploadFile
from PIL import Image
import io

app = FastAPI()

@app.post("/enhance-image/")
async def enhance_image(file: UploadFile = File(...)):
    # Read image
    image_bytes = await file.read()
    image = Image.open(io.BytesIO(image_bytes)).convert("RGB")

    # Enhance image with SD
    enhanced = upscale_pipe(
        prompt="A sharp, high-quality product image",
        image=image
    ).images[0]

    enhanced.save("enhanced_image.jpg")
    return {"message": "Image enhanced successfully"}
Run:
uvicorn app:app --host 0.0.0.0 --port 8000
This enables automatic image enhancement through API calls from your shopping mall system.
Real Business Impact
Cost Savings
- Reduced professional photography costs
- Automated processing for bulk product images
- Saved Photoshop editing manpower/time
Increased Sales
- Improved conversion rates with high-quality images
- Consistent brand image maintenance
- Platform image guideline compliance